
locknseal.in

basement waterproofing

Completed bathroom waterproofing with tiling
Basement Waterproofing, Construction Tips, Crack Repair Solutions, Damp Proofing, Monsoon Protection, Product Guides

Bathroom Waterproofing Kyun Zaroori Hai — Chhoti Si Galti, Neeche Wale Flat Ka Bada Nuksaan

Bathroom ghar ka sabse chhota lekin sabse zyada “high-risk” area hota hai. Din mein kayi baar paani use hota hai — shower, flush, wash basin — aur agar floor aur walls sahi se waterproof na ho, toh yeh paani dheere dheere slab ke andar ghusna shuru kar deta hai. Result? Aapke ghar mein toh problem dikhti hi hai, saath hi neeche wale flat ki ceiling bhi kharab ho jaati hai. Is blog mein hum cover karenge: Bathroom Waterproofing Itni Critical Kyun Hai? Bathroom mein waterproofing sirf ek “extra step” nahi hai — yeh foundation level ka kaam hai. Iski wajah samjho: 1. Continuous Water Exposure Bathroom mein roz paani use hota hai — kitchen ya balcony ke muqable yeh area sabse zyada “wet” rehta hai. Agar floor waterproof nahi hai, toh paani slowly slab ke pores mein absorb hota rehta hai. 2. Sunken Slab Design Zyada tar Indian bathrooms mein sunken slab hota hai — yani floor level neeche hota hai plumbing pipes fit karne ke liye. Is gap mein agar paani bhar jaaye aur waterproofing na ho, toh yeh paani saalon tak andar hi rehta hai, chupke se structure ko damage karta hai. 3. Pipe Joints Aur Fittings Jahan pipes wall ya floor se guzarte hain, wahan chhote gaps rehte hain. Yeh sabse common leakage points hote hain jo aksar ignore ho jaate hain. 4. Adjoining Walls Par Asar Bathroom sirf apne aap tak seepage tak simit nahi rehta — adjoining bedroom ya living room ki wall bhi damp ho sakti hai agar shared wall waterproof na ho. Neeche Wale Flat Ko Kya Nuksaan Hota Hai? Agar aap upar wale floor pe rehte hain aur aapke bathroom mein waterproofing weak hai, toh neeche wale flat mein yeh problems aati hain: Yeh problem sirf paise ka nuksaan nahi karti — relationships pe bhi asar daalti hai. Isliye bathroom waterproofing “optional” nahi, zaroori hai. Bathroom Mein Waterproofing Kahan-Kahan Zaroori Hai? Area Kyun Zaroori Floor (poora, corner to corner) Sabse zyada water exposure Wall junction (floor-wall milne wali jagah) Weakest point, paani yahin se ghusta hai Shower area walls (up to 1.2–1.5 meter height) Direct water splash Pipe penetration points Gaps se leakage common Sunken slab (agar hai) Paani trap hone ka risk sabse zyada Bathroom Waterproofing Ka Sahi Process — Step by Step Step 1: Surface Preparation Purani tiles, loose plaster aur dust poori tarah hataayein. Surface clean, dry aur crack-free hona chahiye. Yeh step skip karna sabse badi galti hai — iske bina koi bhi product properly bond nahi karega. Step 2: Crack Aur Joint Repair Agar floor ya wall mein cracks hain, unhe pehle seal karein. Pipe penetration points ke around bhi extra care se sealing karein — yahan leakage ka risk sabse zyada hota hai. Step 3: Waterproofing Coating Apply Karein Poore floor par aur wall junction par (kam se kam 300mm height tak) waterproofing coating lagayein. Shower wall area mein height 1.2–1.5 meter tak rakhein. Recommended: Lock N Seal Damp Guard 2K — yeh ek 2-component cementitious waterproofing hai jo already damp surfaces pe bhi kaam karta hai aur wet area applications (bathroom, sunken slab) ke liye specially suited hai. Minimum 2 coats lagayein, har coat ke beech proper drying time dein. Step 4: Flood Test (Sabse Important Step Jo Log Skip Karte Hain) Waterproofing cure hone ke baad, floor ko 24-48 ghante ke liye paani se bhar dein (jitna floor design allow kare). Agar koi leakage nahi hai, tabhi aage badhein. Yeh test confirm karta hai ki waterproofing effective hai — bina flood test ke tiling shuru karna risky hai. Step 5: Tiling Flood test pass hone ke baad hi tiles lagaayein. Waterproofing membrane cured aur intact honi chahiye tiling se pehle. DIY Ya Professional — Kya Karein? Chhote repair ya single wall ke liye Lock N Seal ke products DIY-friendly hain. Lekin poori bathroom waterproofing, especially naye construction ya sunken slab wale cases mein, professional application recommend ki jaati hai — kyunki: Galat application se product waste hota hai aur problem 6 mahine mein wapas aa sakti hai. Bathroom Waterproofing Mein Kitna Kharcha Aata Hai? Bathroom Size Approximate Cost Range Small (4×6 ft) ₹8,000 – ₹15,000 Medium (6×8 ft) ₹15,000 – ₹25,000 Large / attached with sunken slab ₹25,000 – ₹40,000+ (Cost material, labour aur surface condition ke hisaab se vary kar sakta hai. Sahi estimate ke liye site inspection zaroori hai.) Common Mistakes Jo Log Karte Hain Lock N Seal Products Jo Bathroom Ke Liye Best Hain Conclusion Bathroom waterproofing dikhne mein chhota kaam lagta hai, lekin iska asar poore building ki health aur aapke relationships tak jaata hai. Ek baar sahi tarike se ki gayi waterproofing — flood test ke saath — saalon tak tension-free rakhti hai. Sasta shortcut lene ki jagah, sahi process follow karein aur sahi product choose karein. Agar aapko apne bathroom mein seepage ki problem hai ya naya construction/renovation plan kar rahe hain, toh Lock N Seal ki team se free consultation lein. 📞 9873620002 🌐 locknseal.in/contact-us Frequently Asked Questions (FAQ) Q1. Bathroom waterproofing kab karwani chahiye? Ideally construction ya renovation ke waqt hi, tiling lagne se pehle. Agar existing bathroom mein seepage aa rahi hai, toh turant waterproofing karwani chahiye — jitna der karenge, damage utna badhega. Q2. Kya sirf floor waterproof karna kaafi hai? Nahi. Floor ke saath wall junction (kam se kam 300mm height) aur shower area walls bhi waterproof karna zaroori hai, warna paani side se upar chadh sakta hai. Q3. Flood test kya hota hai aur kyun zaroori hai? Flood test mein waterproofing cure hone ke baad floor ko 24-48 ghante paani se bhar ke check kiya jaata hai ki koi leakage toh nahi. Yeh confirm karta hai ki tiling se pehle waterproofing effective hai. Q4. Kya main apne bathroom ki waterproofing khud kar sakta hoon? Chhoti repairs ke liye Lock N Seal ke products DIY-friendly hain. Lekin poori bathroom, sunken slab ya naye construction ke liye professional application better rehta hai. Q5. Neeche wale flat mein seepage aa rahi hai — kya
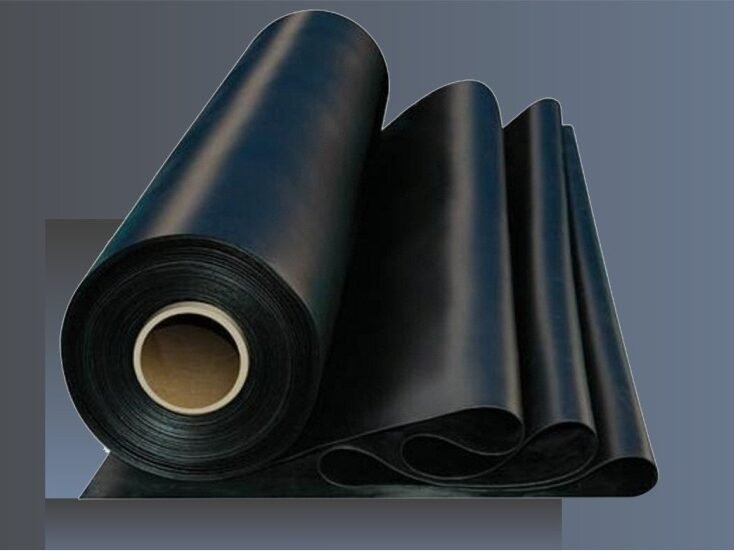
lock n seal self bitumen membrane waterproofing sheet
Basement Waterproofing, Construction Tips, Damp Proofing, Monsoon Protection, Product Guides, Terrace Waterproofing, Uncategorized, Wall Protection

Basement Waterproofing Guide: Complete Solutions to Prevent Water Seepage

Introduction Basement waterproofing is essential to protect your home from water seepage, dampness, and structural damage. Without proper waterproofing, basements are vulnerable to moisture infiltration, leading to mold growth, wall cracks, and foundation weakening. In this comprehensive basement waterproofing guide, we’ll cover everything you need to know – from identifying water seepage signs to choosing the right waterproofing materials and methods. Whether you’re building a new basement or renovating an existing one, this guide will help you make informed decisions. 1. Why is Basement Waterproofing Important? Key Points: Include: 2. Signs Your Basement Needs Waterproofing Warning Signs: Add visual cues/symptoms table 3. Types of Basement Waterproofing Methods A) Internal Waterproofing Pros & Cons B) External Waterproofing Pros & Cons C) Cavity Drain Membrane System Comparison Table: Method Cost Durability Best For 4. Best Waterproofing Materials for Basements Recommended Products: 1. Self Adhesive Bitumen Sheets 2. Liquid Waterproofing Membranes 3. Crystalline Waterproofing 4. Cementitious Waterproofing 5. Drainage Mats & French Drains Product Comparison Chart 5. Step-by-Step Basement Waterproofing Process Preparation Phase: External Waterproofing: Internal Waterproofing: Include: 6. Common Basement Waterproofing Mistakes to Avoid ❌ Mistakes: 7. Basement Waterproofing Cost in India Cost Breakdown: Internal Waterproofing: External Waterproofing: Factors Affecting Cost: Sample Cost Table for Different Basement Sizes 8. DIY vs Professional Waterproofing When to DIY: When to Hire Professionals: Cost-Benefit Analysis 9. Maintenance Tips for Waterproofed Basements Regular Maintenance: Frequently Asked Questions Q1: How long does basement waterproofing last? A: Quality external waterproofing can last 10-15 years, while internal coatings need reapplication every 5-7 years. Q2: Can I waterproof my basement from inside only? A: Internal waterproofing helps manage minor dampness but doesn’t stop water at source. External waterproofing is more effective. Q3: What is the best time to waterproof a basement? A: Dry season (November to March in India) is ideal for waterproofing work. Q4: Is basement waterproofing covered by insurance? A: Generally no, but check your policy. Preventive waterproofing is homeowner’s responsibility. Q5: Can waterproofing be done in monsoon? A: External waterproofing should be avoided during monsoon. Internal coating can be done with proper ventilation. Q6: Which is better – bitumen or polymer waterproofing? A: Both are effective. Bitumen sheets are durable and easy to install, while polymer membranes offer more flexibility. Q7: How deep should basement waterproofing go? A: External waterproofing should extend from foundation footing to ground level. Q8: Do I need a sump pump for basement? A: If your basement is below water table or has recurring water issues, a sump pump is recommended. Conclusion Basement waterproofing is a crucial investment that protects your home’s foundation and ensures a dry, healthy living environment. By following this comprehensive guide, you can choose the right waterproofing method and materials for your basement. For effective and long-lasting basement waterproofing, consider using quality products like self adhesive bitumen sheets from Ignite Polymers. Whether you opt for DIY or professional installation, proper waterproofing will save you from costly repairs and structural damage in the long run. Don’t wait for water seepage to worsen – take action today to protect your basement and home. For expert advice on basement waterproofing solutions, contact Lock-n-seal.

wall crack repair solution for seepage and dampness
Basement Waterproofing, Construction Tips, Crack Repair Solutions, Monsoon Protection, Product Guides, Terrace Waterproofing, Wall Protection, Waterproofing Solutions

Crack-O-Seal Acrylic Crack Filler: दीवारों और कंक्रीट की दरारों का स्थायी समाधान

दीवारों में दरारें केवल देखने में खराब नहीं लगतीं, बल्कि अगर समय पर ठीक न की जाएँ तो ये पानी के रिसाव, सीलन और लंबे समय में संरचनात्मक नुकसान का कारण बन सकती हैं। इसलिए सही क्रैक रिपेयर सॉल्यूशन चुनना बेहद ज़रूरी है। Crack-O-Seal – Ready-to-Use Acrylic Crack Filler एक भरोसेमंद, टिकाऊ और आसानी से लगाने वाला समाधान है, जो प्लास्टर की गई दीवारों और कंक्रीट सतहों की दरारों को प्रभावी रूप से भरने के लिए डिज़ाइन किया गया है। दीवारों में दरारें क्यों पड़ती हैं? दीवारों और कंक्रीट में दरारें कई कारणों से हो सकती हैं, जैसे: इन समस्याओं को प्रभावी रूप से हल करने के लिए लचीला और वाटरप्रूफ क्रैक फिलर बेहद ज़रूरी है। Crack-O-Seal Acrylic Crack Filler क्या है? Crack-O-Seal एक उच्च गुणवत्ता वाला Acrylic Crack Filler है, जिसे विशेष रूप से प्लास्टर की गई दीवारों और कंक्रीट सतहों की दरारों को ठीक करने के लिए बनाया गया है। यह रेडी-टू-यूज़ फॉर्म में आता है, जिससे किसी भी तरह की मिक्सिंग या अतिरिक्त तैयारी की ज़रूरत नहीं पड़ती। इसकी मजबूत पकड़, बेहतरीन लचीलापन और वाटरप्रूफ गुण दरारों को स्थायी रूप से सील करते हैं और दोबारा क्रैक आने से रोकते हैं। Crack-O-Seal की मुख्य विशेषताएँ ✔ रेडी-टू-यूज़ फॉर्मूलाकोई मिक्सिंग नहीं। सीधे कंटेनर से निकालकर लगाएँ, समय और मेहनत दोनों की बचत। ✔ मजबूत पकड़ (Strong Adhesion)कंक्रीट, प्लास्टर और मेसनरी सतहों पर बेहतरीन बॉन्डिंग। ✔ लचीला और टिकाऊ (Flexible & Durable)दीवारों की प्राकृतिक हलचल के अनुसार एडजस्ट करता है, जिससे दोबारा दरार पड़ने की संभावना कम होती है। ✔ वाटरप्रूफ सुरक्षापानी के रिसाव और सीलन से बचाता है, जिससे सतह लंबे समय तक सुरक्षित रहती है। ✔ पेंट करने योग्य फिनिश (Paintable Finish)सूखने के बाद सतह को आसानी से पेंट किया जा सकता है, जिससे स्मूथ और साफ लुक मिलता है। Crack-O-Seal कहाँ इस्तेमाल किया जा सकता है? Crack-O-Seal लगाने की विधि इसका उपयोग आसान है और इसके लिए किसी प्रोफेशनल स्किल की ज़रूरत नहीं होती। Crack-O-Seal बनाम सामान्य क्रैक फिलर विशेषता Crack-O-Seal सामान्य क्रैक फिलर रेडी-टू-यूज़ ✔ ✖ वाटरप्रूफ ✔ ✖ लचीला ✔ सीमित पेंटेबल ✔ सीमित लंबे समय तक टिकाऊ ✔ ✖ Crack-O-Seal के फायदे लंबे समय तक टिकने वाला क्रैक रिपेयर समाधान दीवारों को पानी के रिसाव और सीलन से बचाता है सतह की मजबूती और उम्र बढ़ाता है किफायती मेंटेनेंस सॉल्यूशन प्रोफेशनल फिनिश देता है निष्कर्ष (Conclusion) अगर आप दीवारों और कंक्रीट की दरारों के लिए एक भरोसेमंद और टिकाऊ समाधान ढूंढ रहे हैं, तो Crack-O-Seal Acrylic Crack Filler सबसे बेहतर विकल्प है। इसकी मजबूत पकड़, लचीलापन और वाटरप्रूफ सुरक्षा दीवारों को लंबे समय तक सुरक्षित रखती है और बेहतरीन फिनिश देती है। एक बार सील करें। सालों तक सुरक्षित रखें। FAQs – Crack-O-Seal Acrylic Crack Filler Q1. क्या Crack-O-Seal बाहरी दीवारों के लिए उपयुक्त है?हाँ, यह वाटरप्रूफ और मौसम-प्रतिरोधी है, इसलिए बाहरी उपयोग के लिए भी आदर्श है। Q2. क्या लगाने के बाद पेंट किया जा सकता है?हाँ, पूरी तरह सूखने के बाद इस पर सामान्य वॉल पेंट किया जा सकता है। Q3. क्या यह हेयरलाइन क्रैक्स पर भी काम करता है?हाँ, यह हेयरलाइन और सतही दोनों प्रकार की दरारों के लिए प्रभावी है। Q4. क्या इस्तेमाल से पहले मिक्सिंग की ज़रूरत है?नहीं, Crack-O-Seal रेडी-टू-यूज़ है, इसमें किसी मिक्सिंग की ज़रूरत नहीं।

Scroll to Top